
Model Context Protocol
Cited biomedical evidence, inside
Works with
Why MCP for evidence
Three things you get that you don't from web search.
How it works
Just sign in with your existing Amass account.
Connect Amass MCP from any supported assistant and sign in once with your existing Amass account. That's the whole setup — nothing else to configure. The assistant then queries Amass on your behalf, with the same access your plan already gives you.

Install in Claude
Connect Amass to Claude in under a minute.
Four steps, ending in a one-time Amass sign-in. Requires Claude Pro, Max, Team, or Enterprise.
In Claude, open Settings → Connectors and click + → Add custom connector.
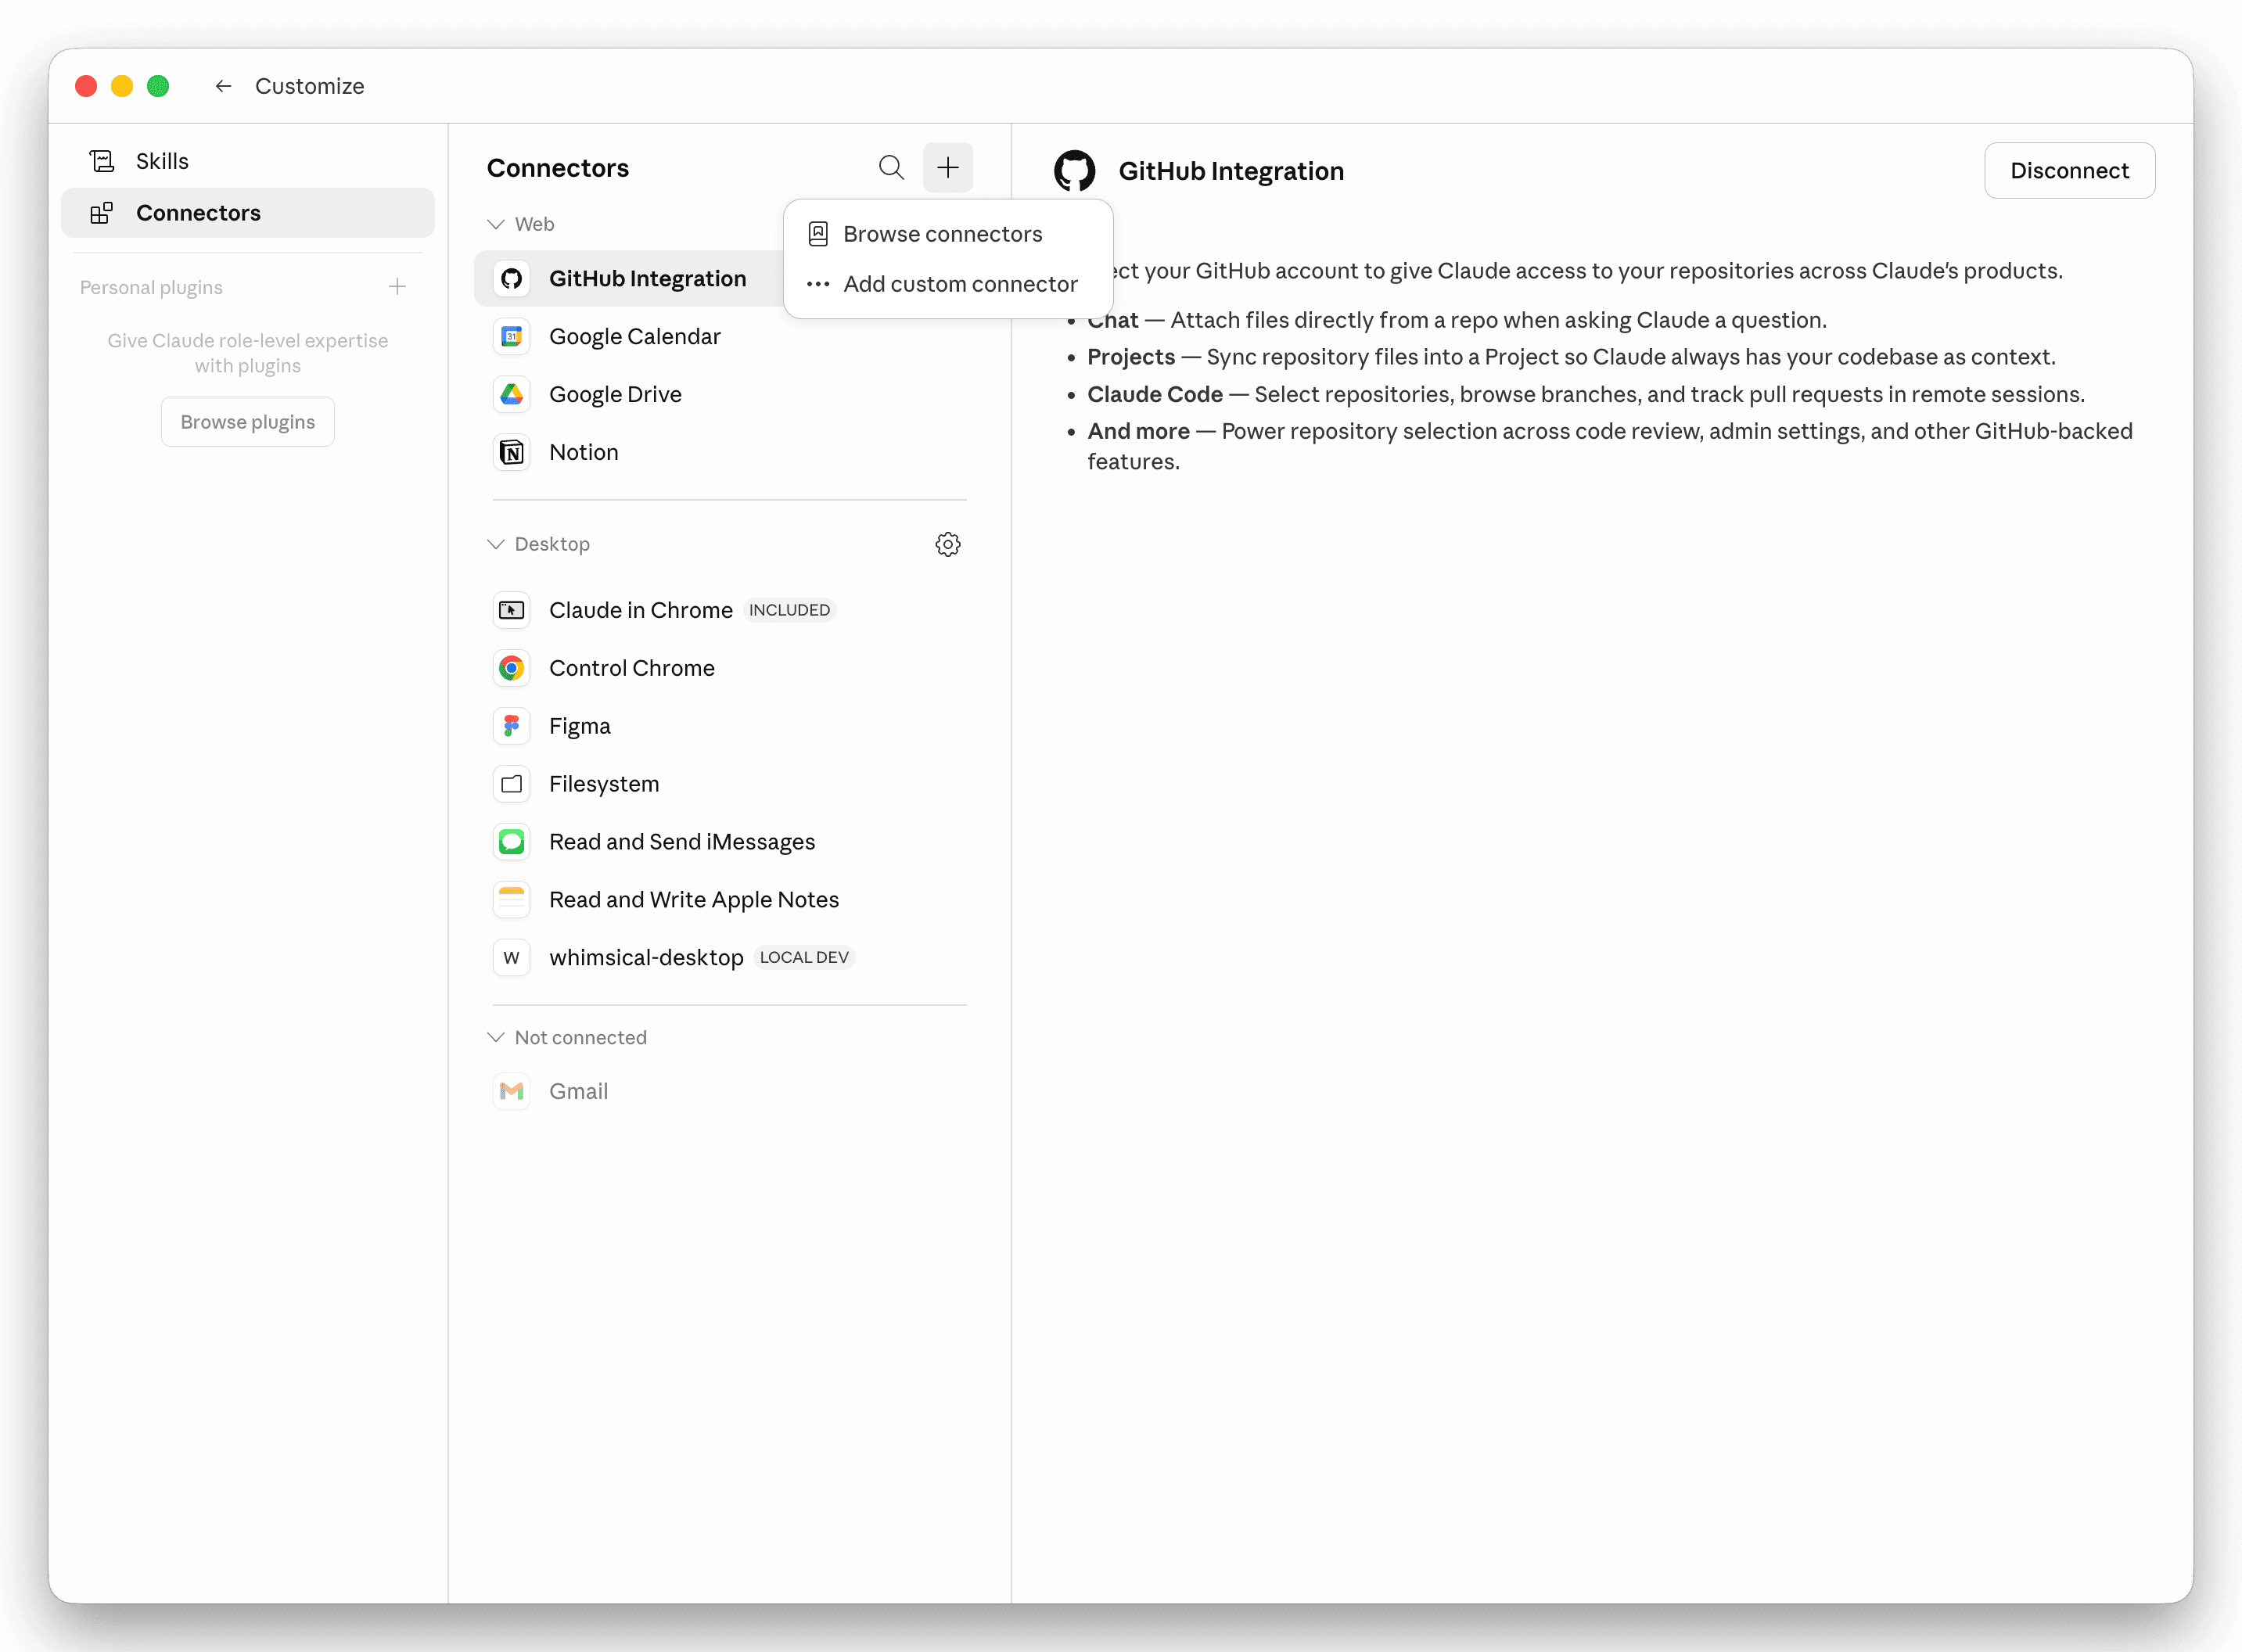
Name it “Amass” and paste this URL:
https://mcp.amass.tech/mcp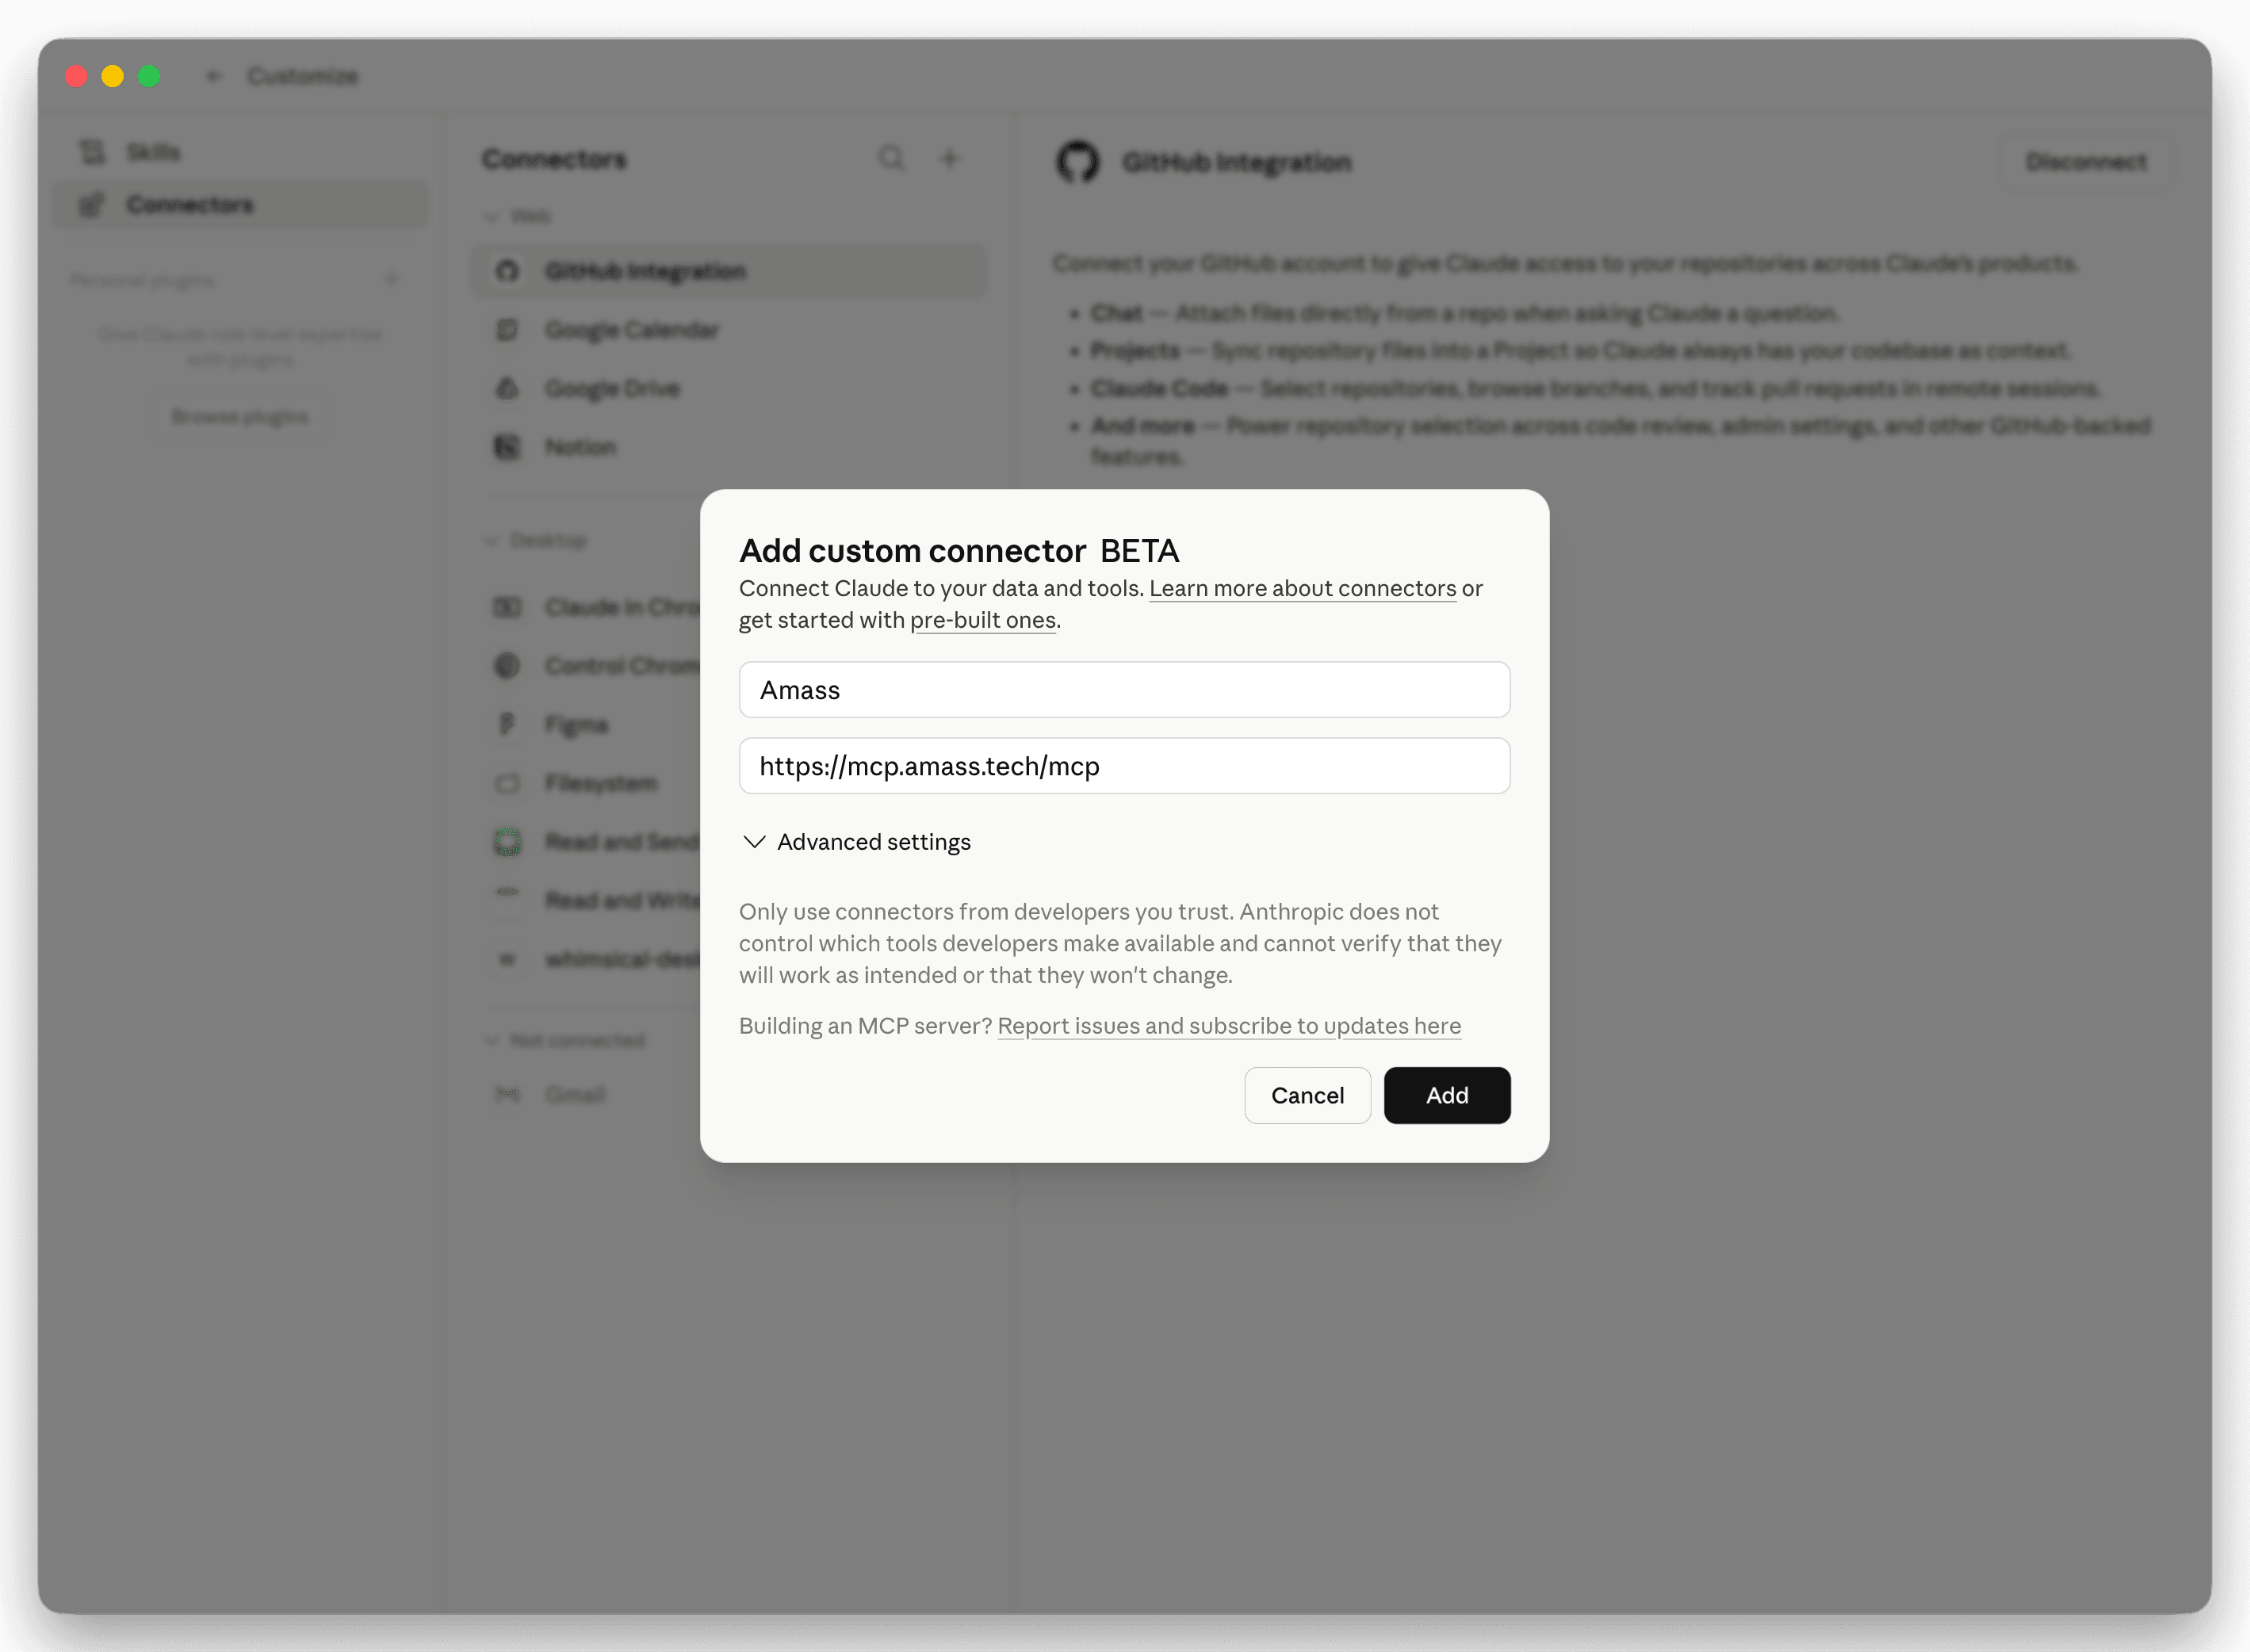
Click Add to save the connector.
Click Connect to authorize Amass.
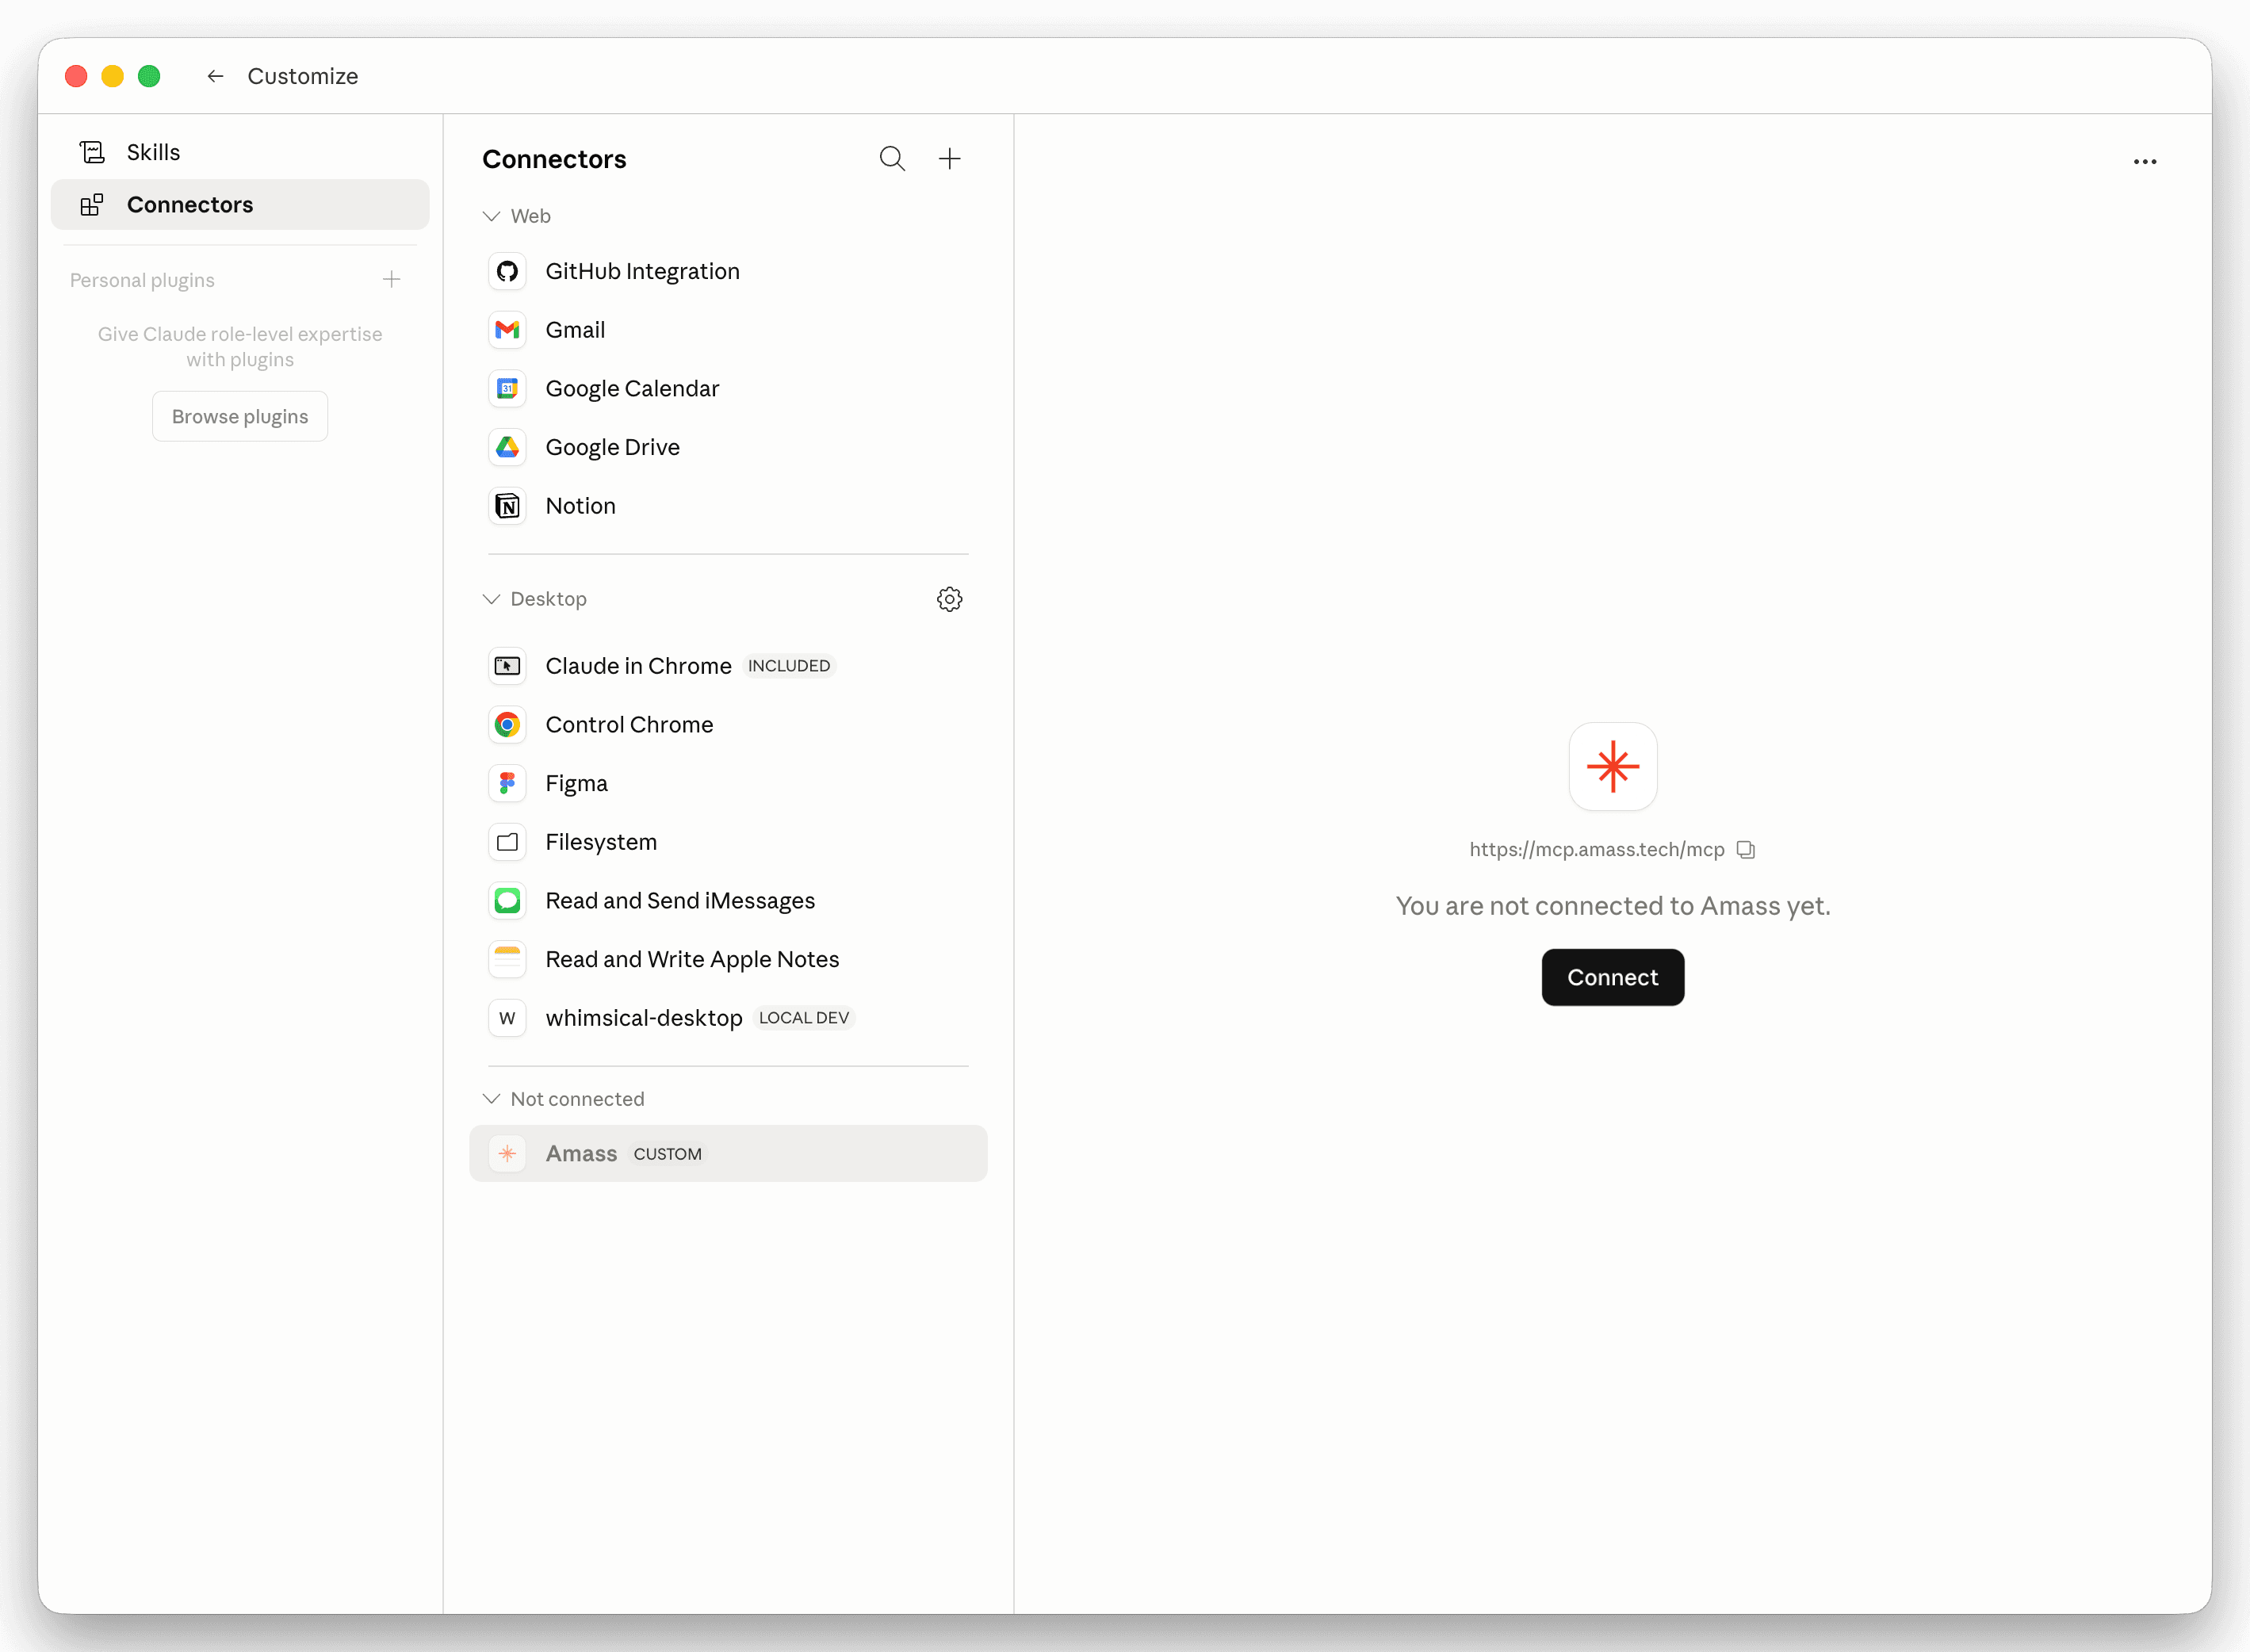
You'll be redirected to sign in with your Amass account. That's it — your existing plan's access applies through the MCP.
The skill
Install the Biomedical Evidence Scout skill to get more out of Amass.
The skill is a small instruction pack that teaches the assistant how to use Amass well — when to filter by journal quality, how to structure landscape scans, when to drill into a specific record. Works in any assistant that supports the open SKILL.md format: Claude, Codex, GitHub Copilot, Gemini CLI.
How do I install the skill file?
Double-click the .skill file on Mac to install it into Claude. For other tools, unzip the .zipinto the tool's skills directory:
- Claude Code:
~/.claude/skills/ - Codex:
~/.codex/skills/ - Gemini CLI:
~/.gemini/skills/

Try it
Once it's connected, start asking.
Switch between baseline MCP queries the connector handles well, and the harder asks the skill is built to make easier.
See it in action
A real query, in Claude, with citations.
Other assistants
Also works in ChatGPT, Codex, and Claude Code.
Same connector URL, same one-time Amass sign-in. Pick your tool.
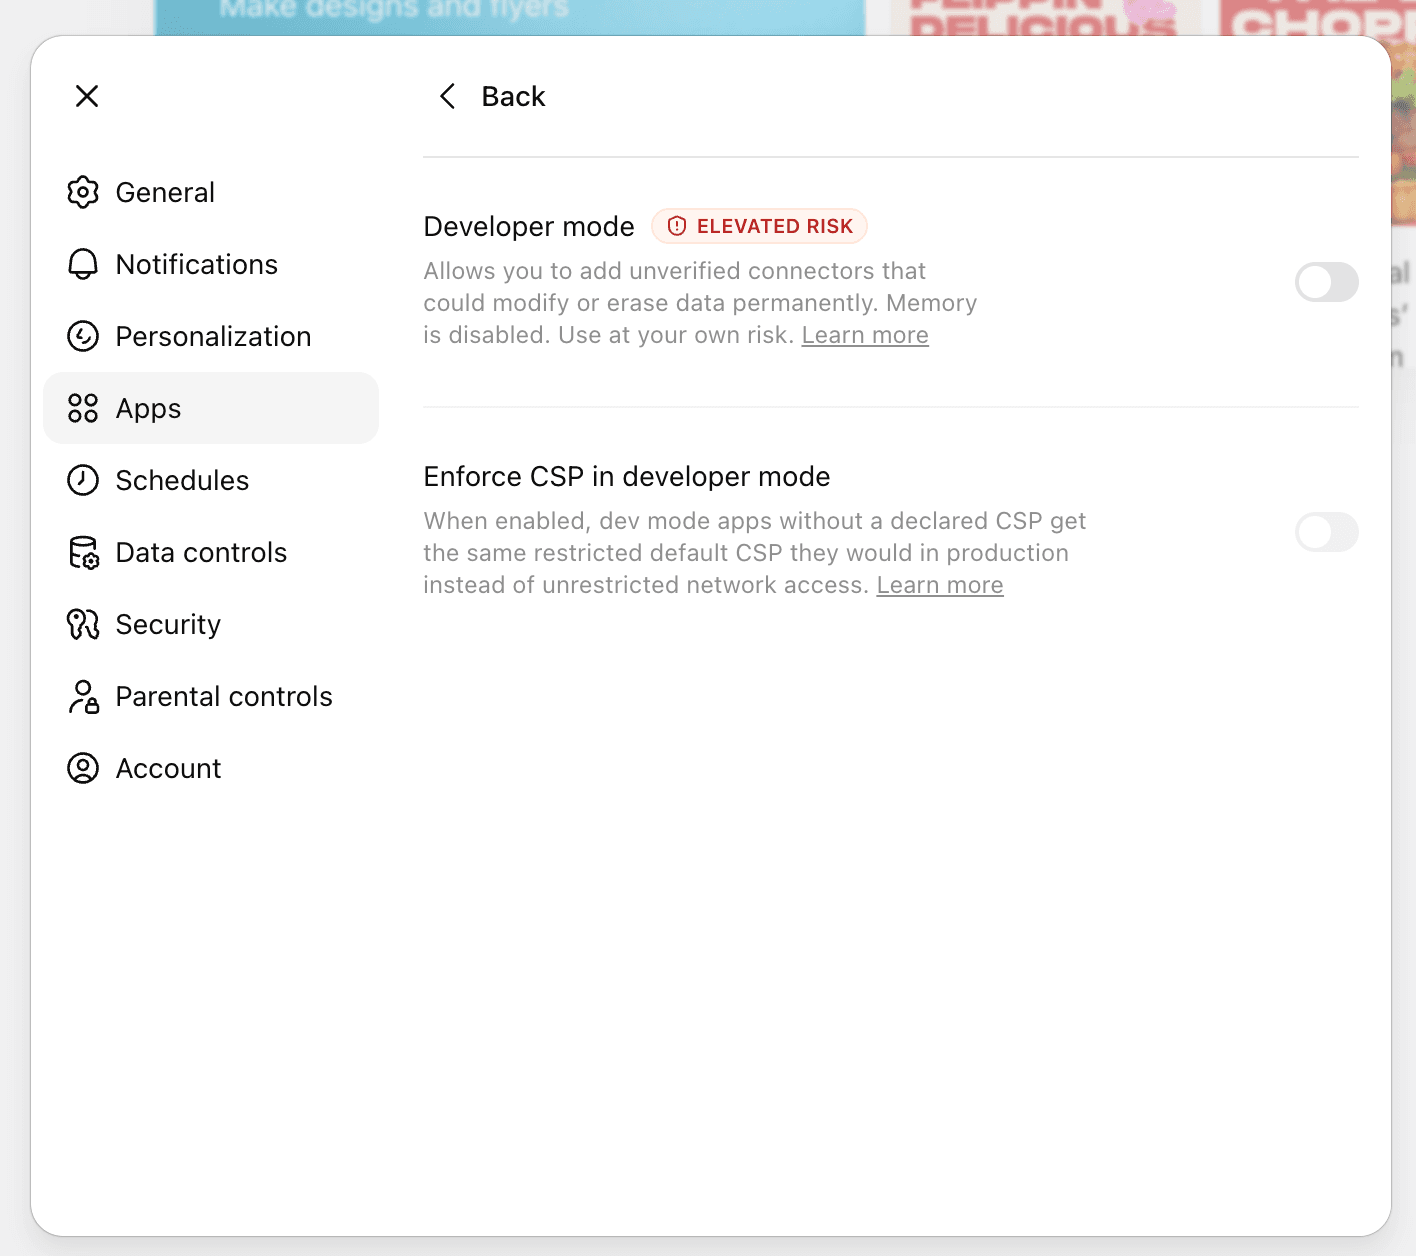
Open Settings → Apps and turn on Developer mode.
From the ChatGPT sidebar, click your avatar → Settings → Apps. Developer mode is off by default — flip it on. ChatGPT will warn that it's an elevated-risk feature; that's expected.
NoteMemory is automatically disabled in chats that use developer-mode connectors. Leave Enforce CSP in developer mode off unless your IT team requires it.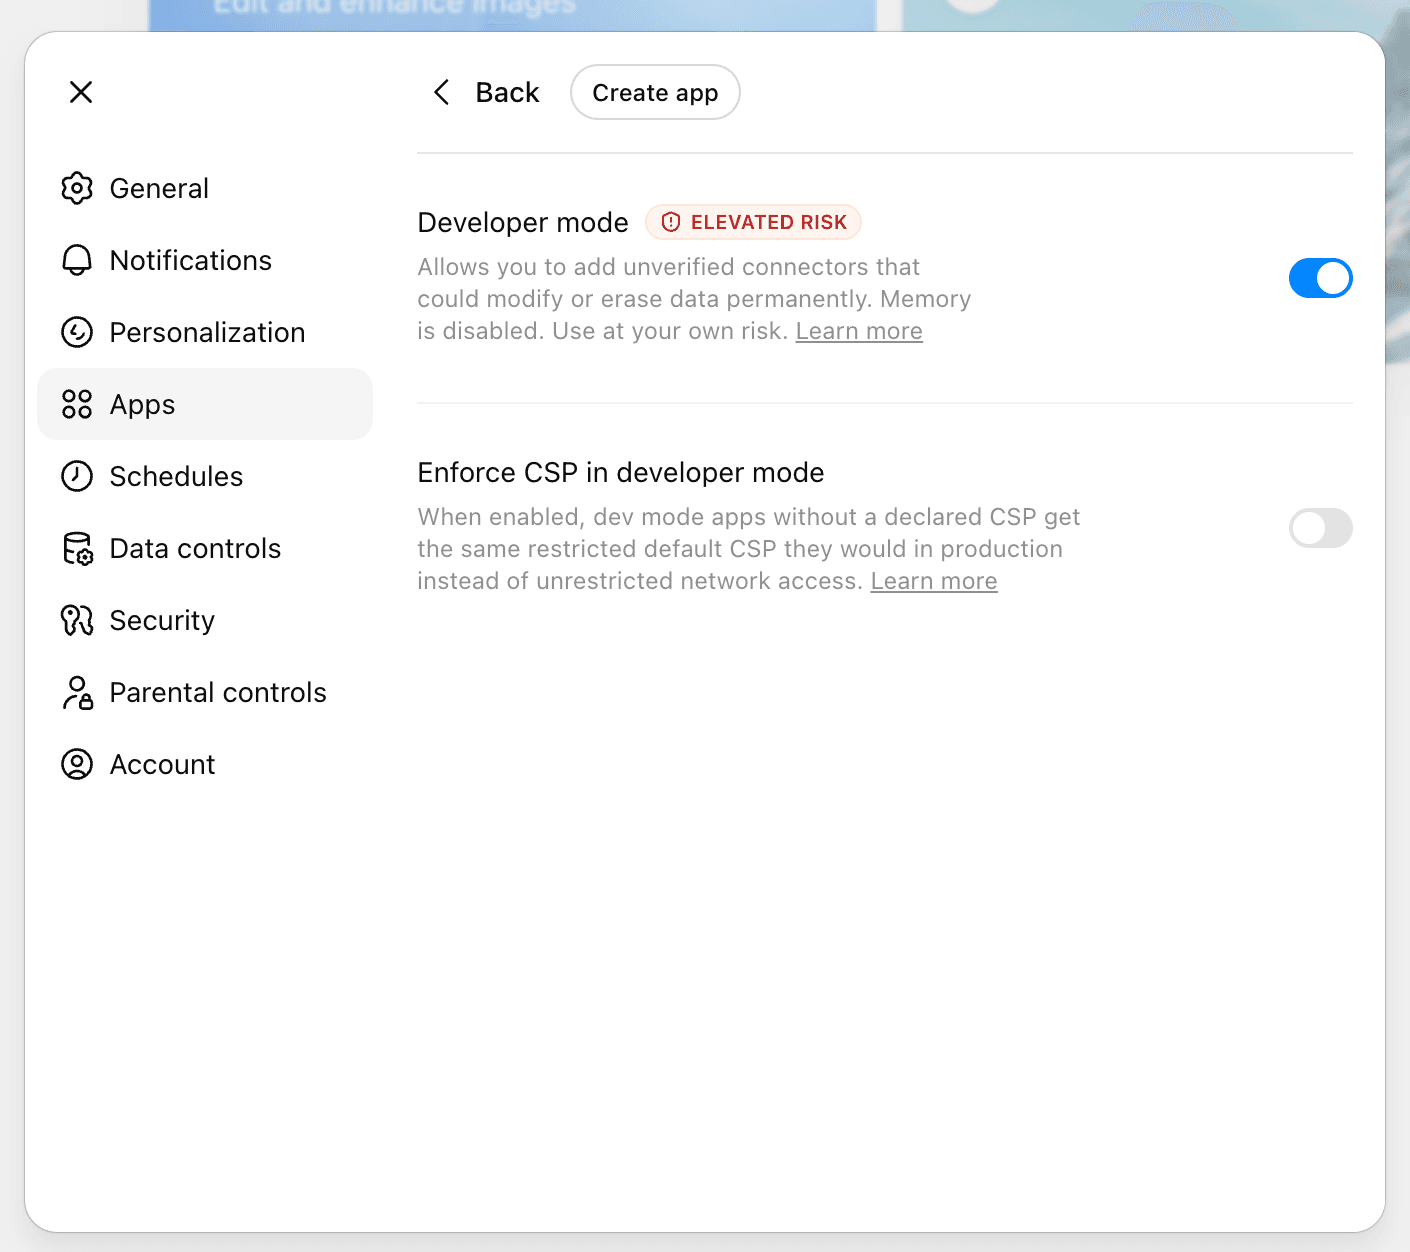
Settings → AppsToggle Developer mode — Create app appears Click Create app and fill in the connector details.
A New App dialog opens. Use these values exactly. Description and icon are optional.
- Name
- Amass MCP
- MCP Server URL
https://mcp.amass.tech/mcp- Authentication
- OAuth
- Risk checkbox
- Tick “I understand and want to continue”
https://mcp.amass.tech/mcp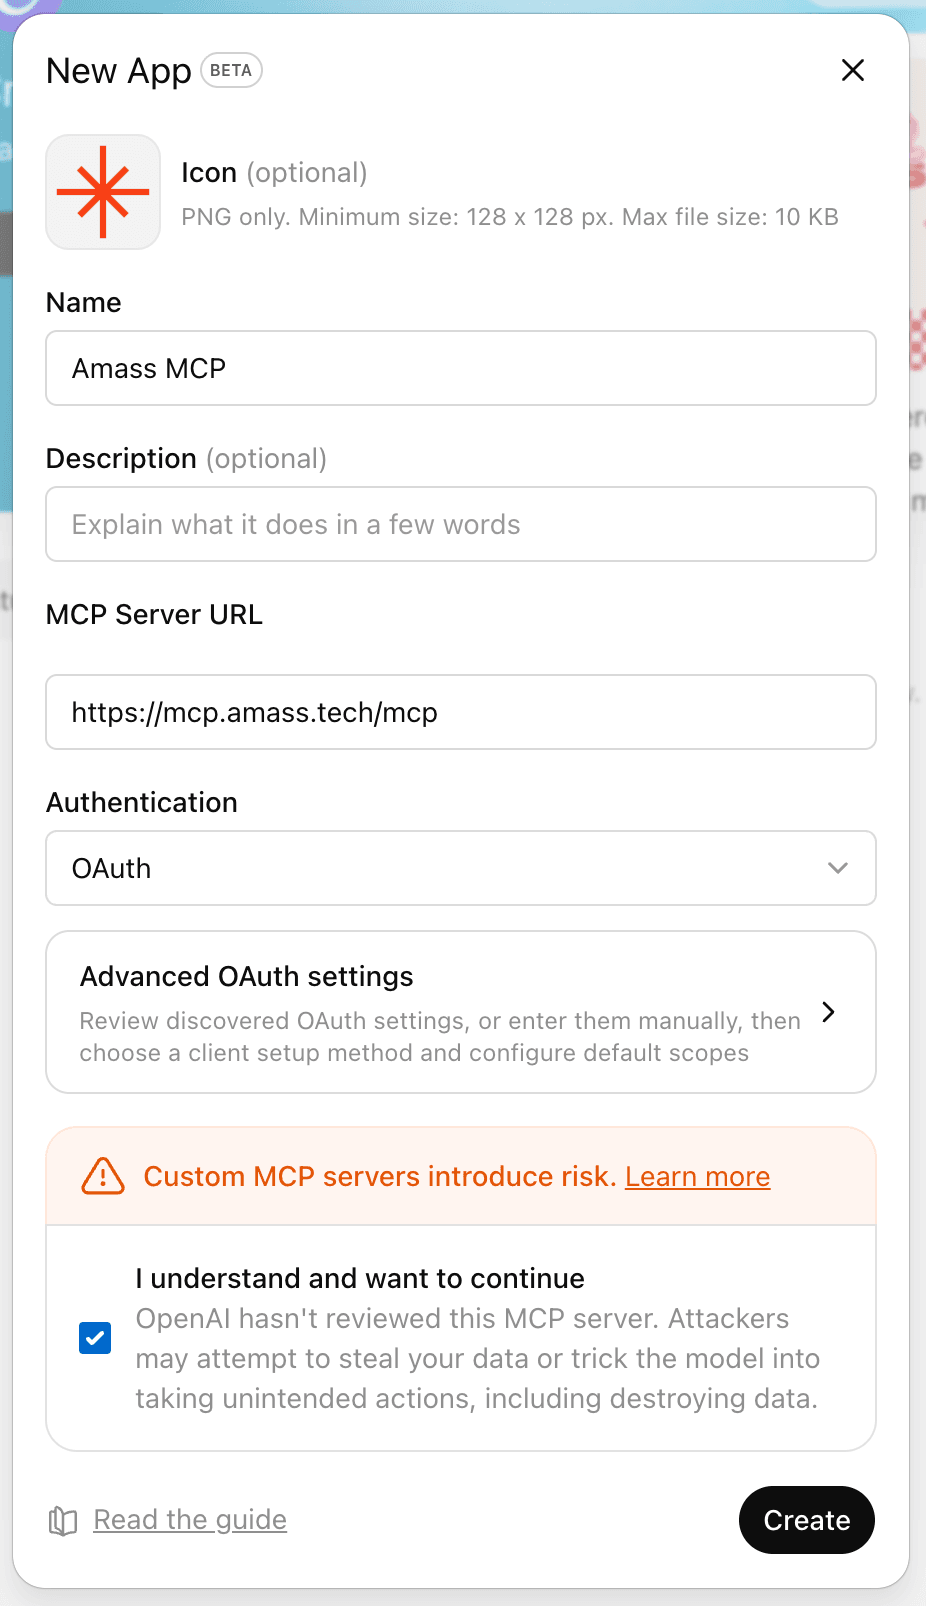
New App · BetaPress Create to continue Sign in to Amass and allow access.
ChatGPT redirects to
auth.amass.tech. Sign in with your existing Amass account, then press Allow access. Your Amass plan's entitlements apply through the connector — no API keys to manage.NoteYou'll see the Amass mark, ChatGPT's avatar, and the email you're signed in as. Confirm it's the right account before allowing access.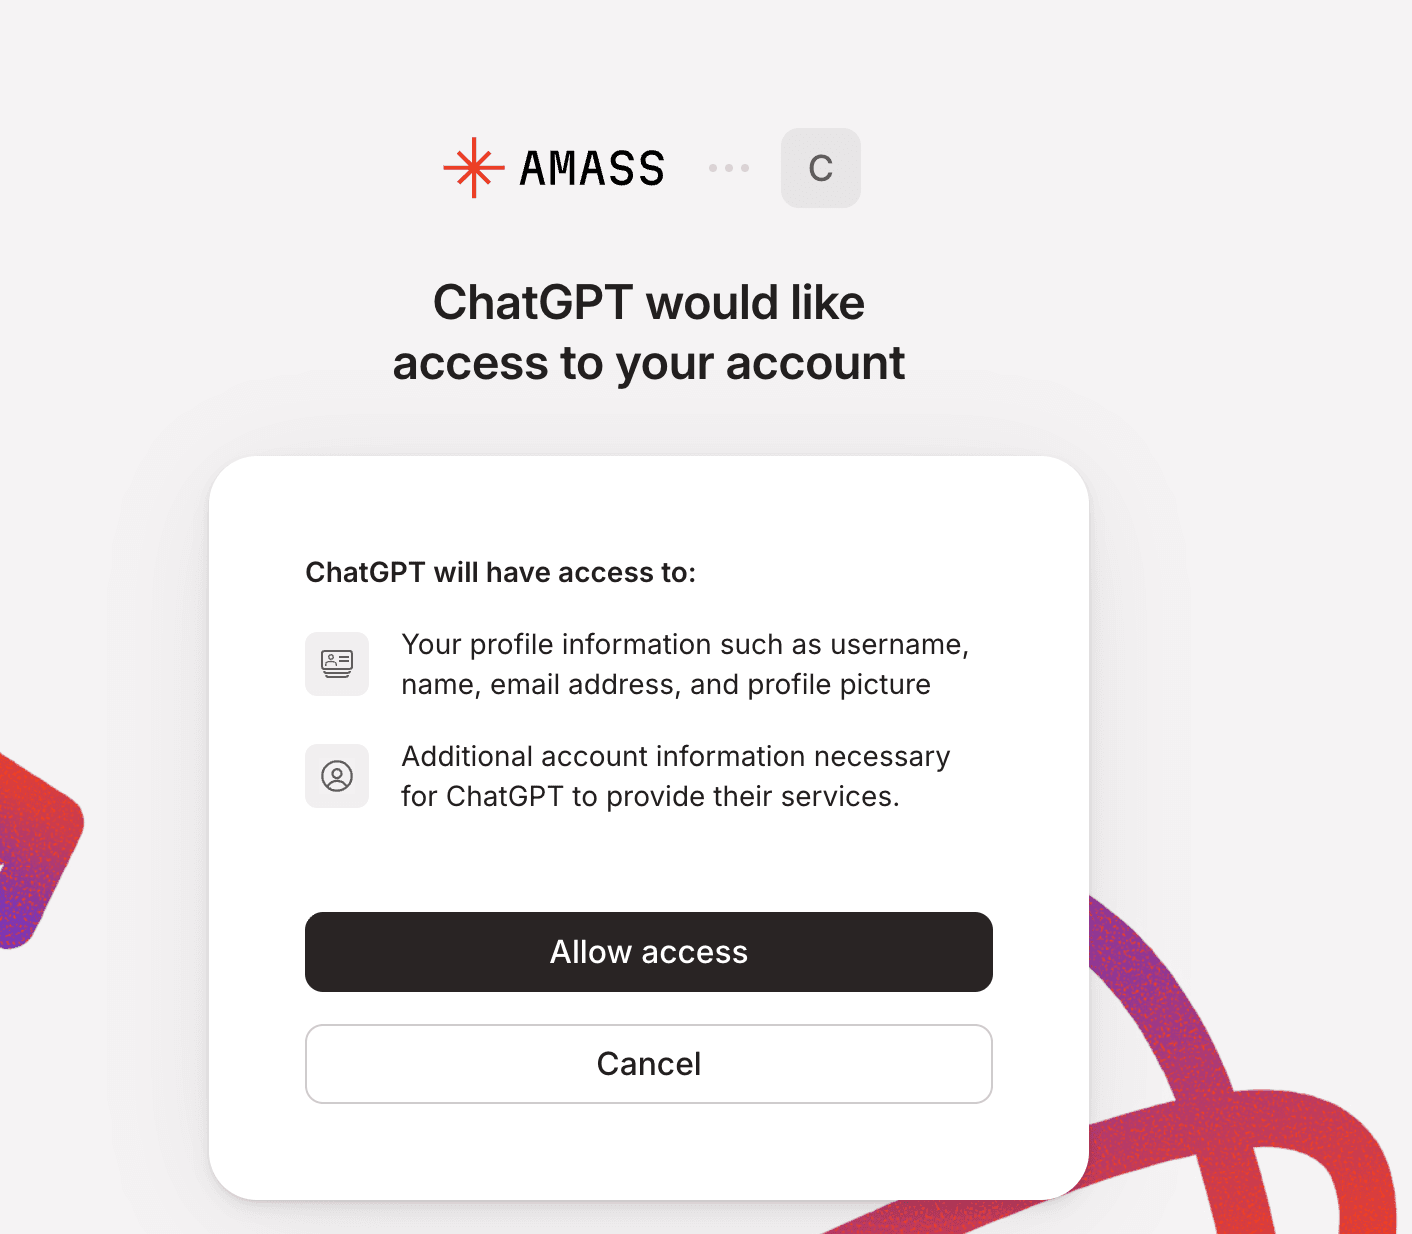
auth.amass.techPress Allow access Confirm Amass MCP is connected.
You're returned to ChatGPT and a green “Amass MCP is now connected” toast appears. Amass MCP also shows up under Apps → Drafts(private apps you've created in developer mode).

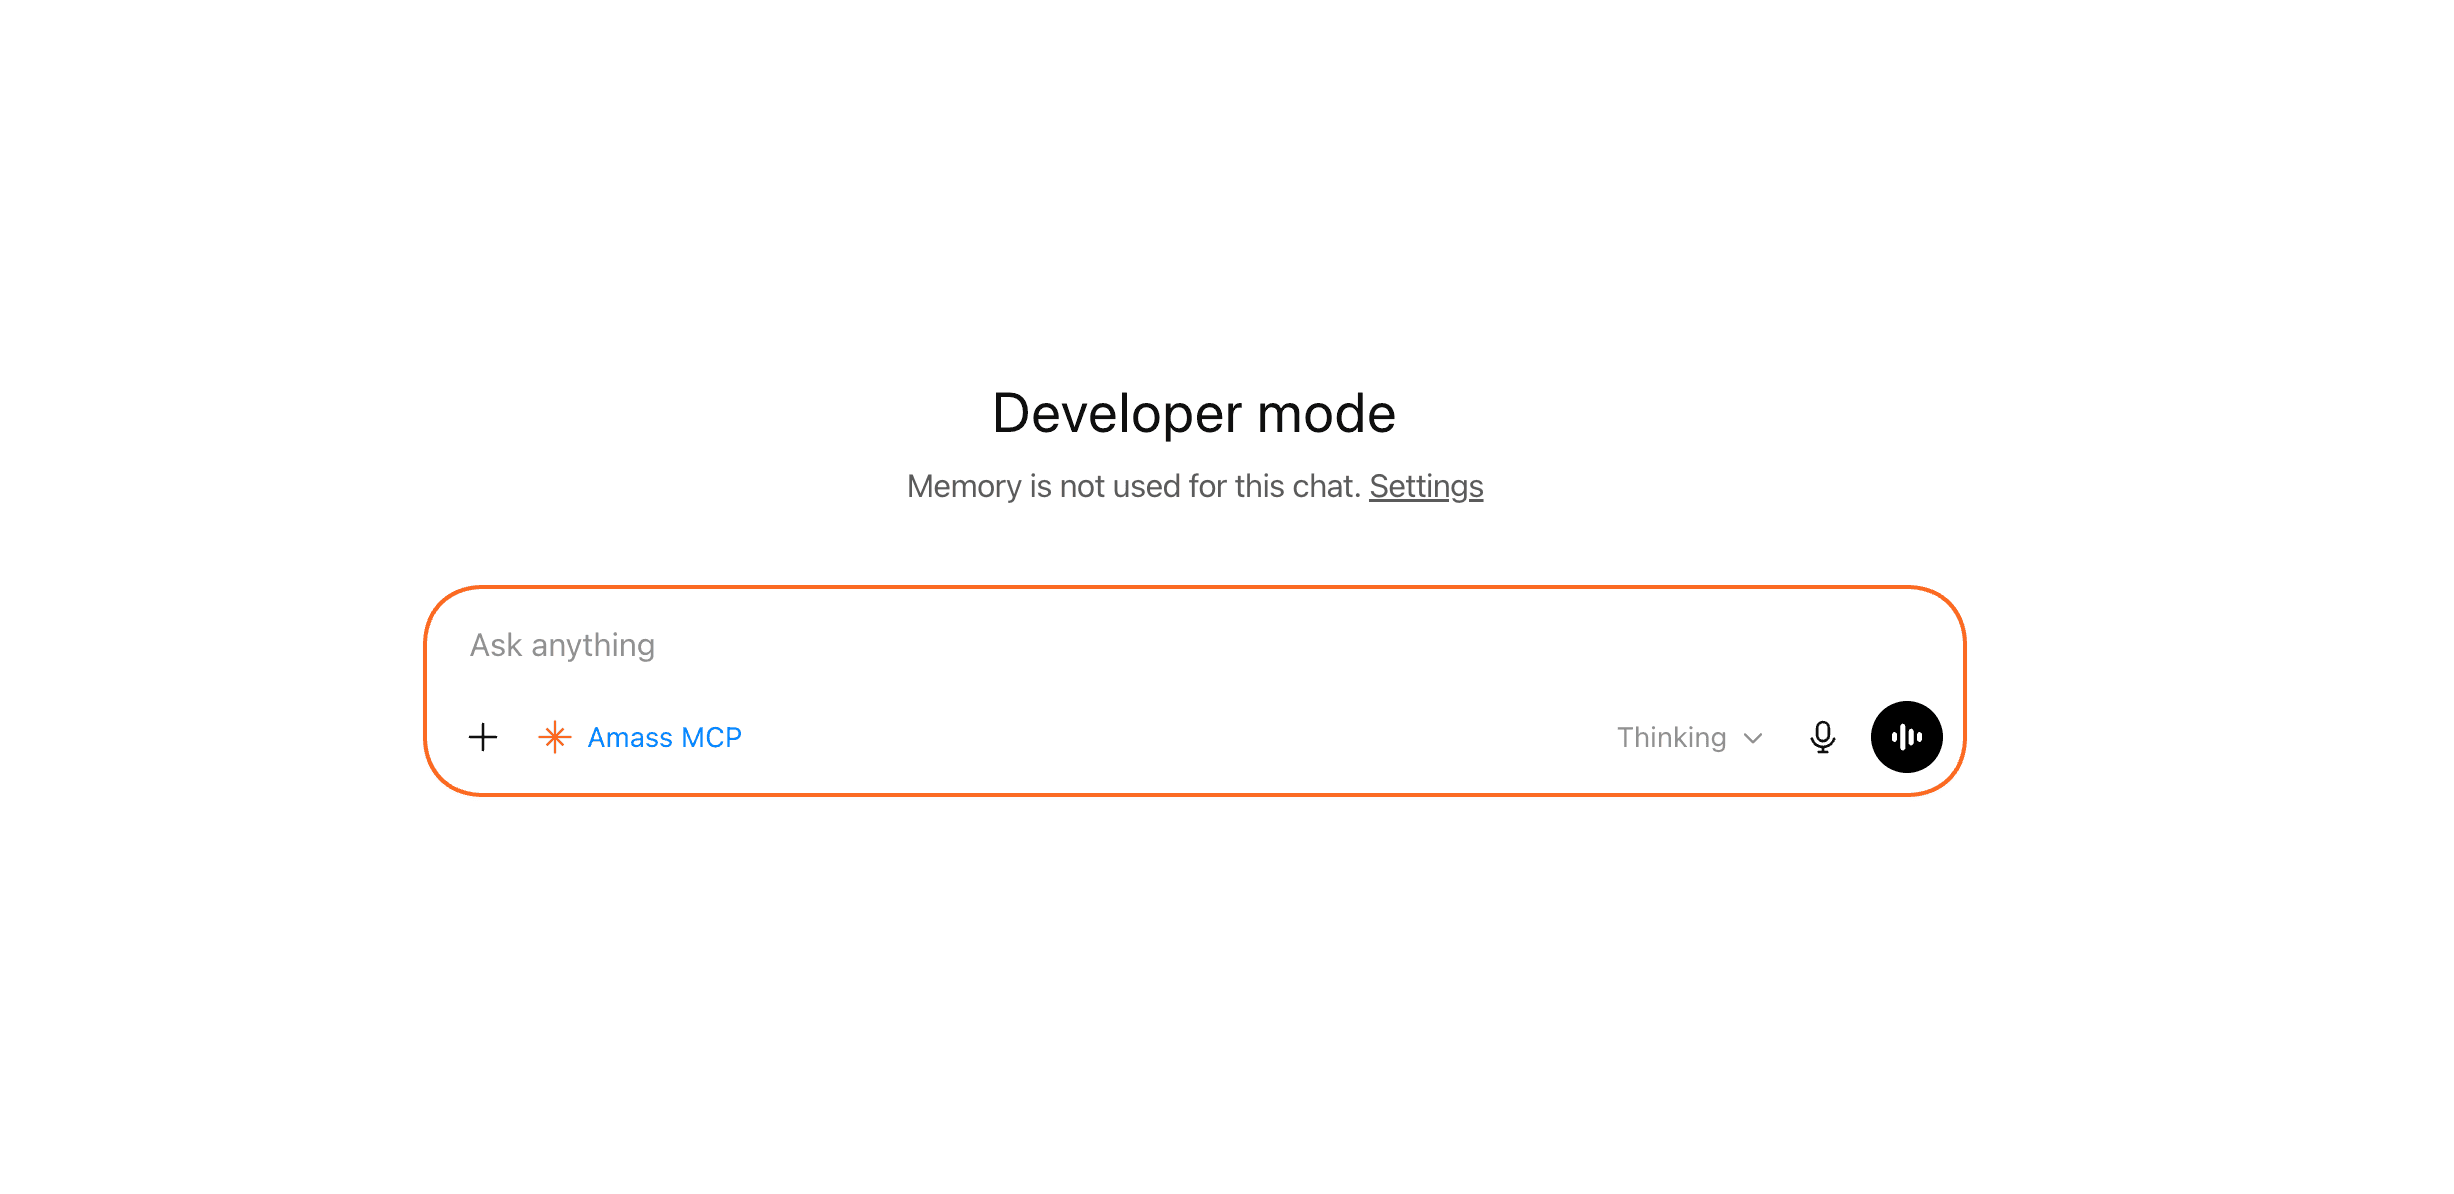
ConfirmationToast appears in the top of the app Start a new chat and attach Amass MCP.
In the composer, click the + button and select Amass MCPfrom the menu. The composer gets a red Amass MCP chip and an orange ring — Amass is now in the conversation's tool stack.
- Open a new chat (or reuse an existing one).
- Click the
+in the composer. - Pick Amass MCP from the dropdown.
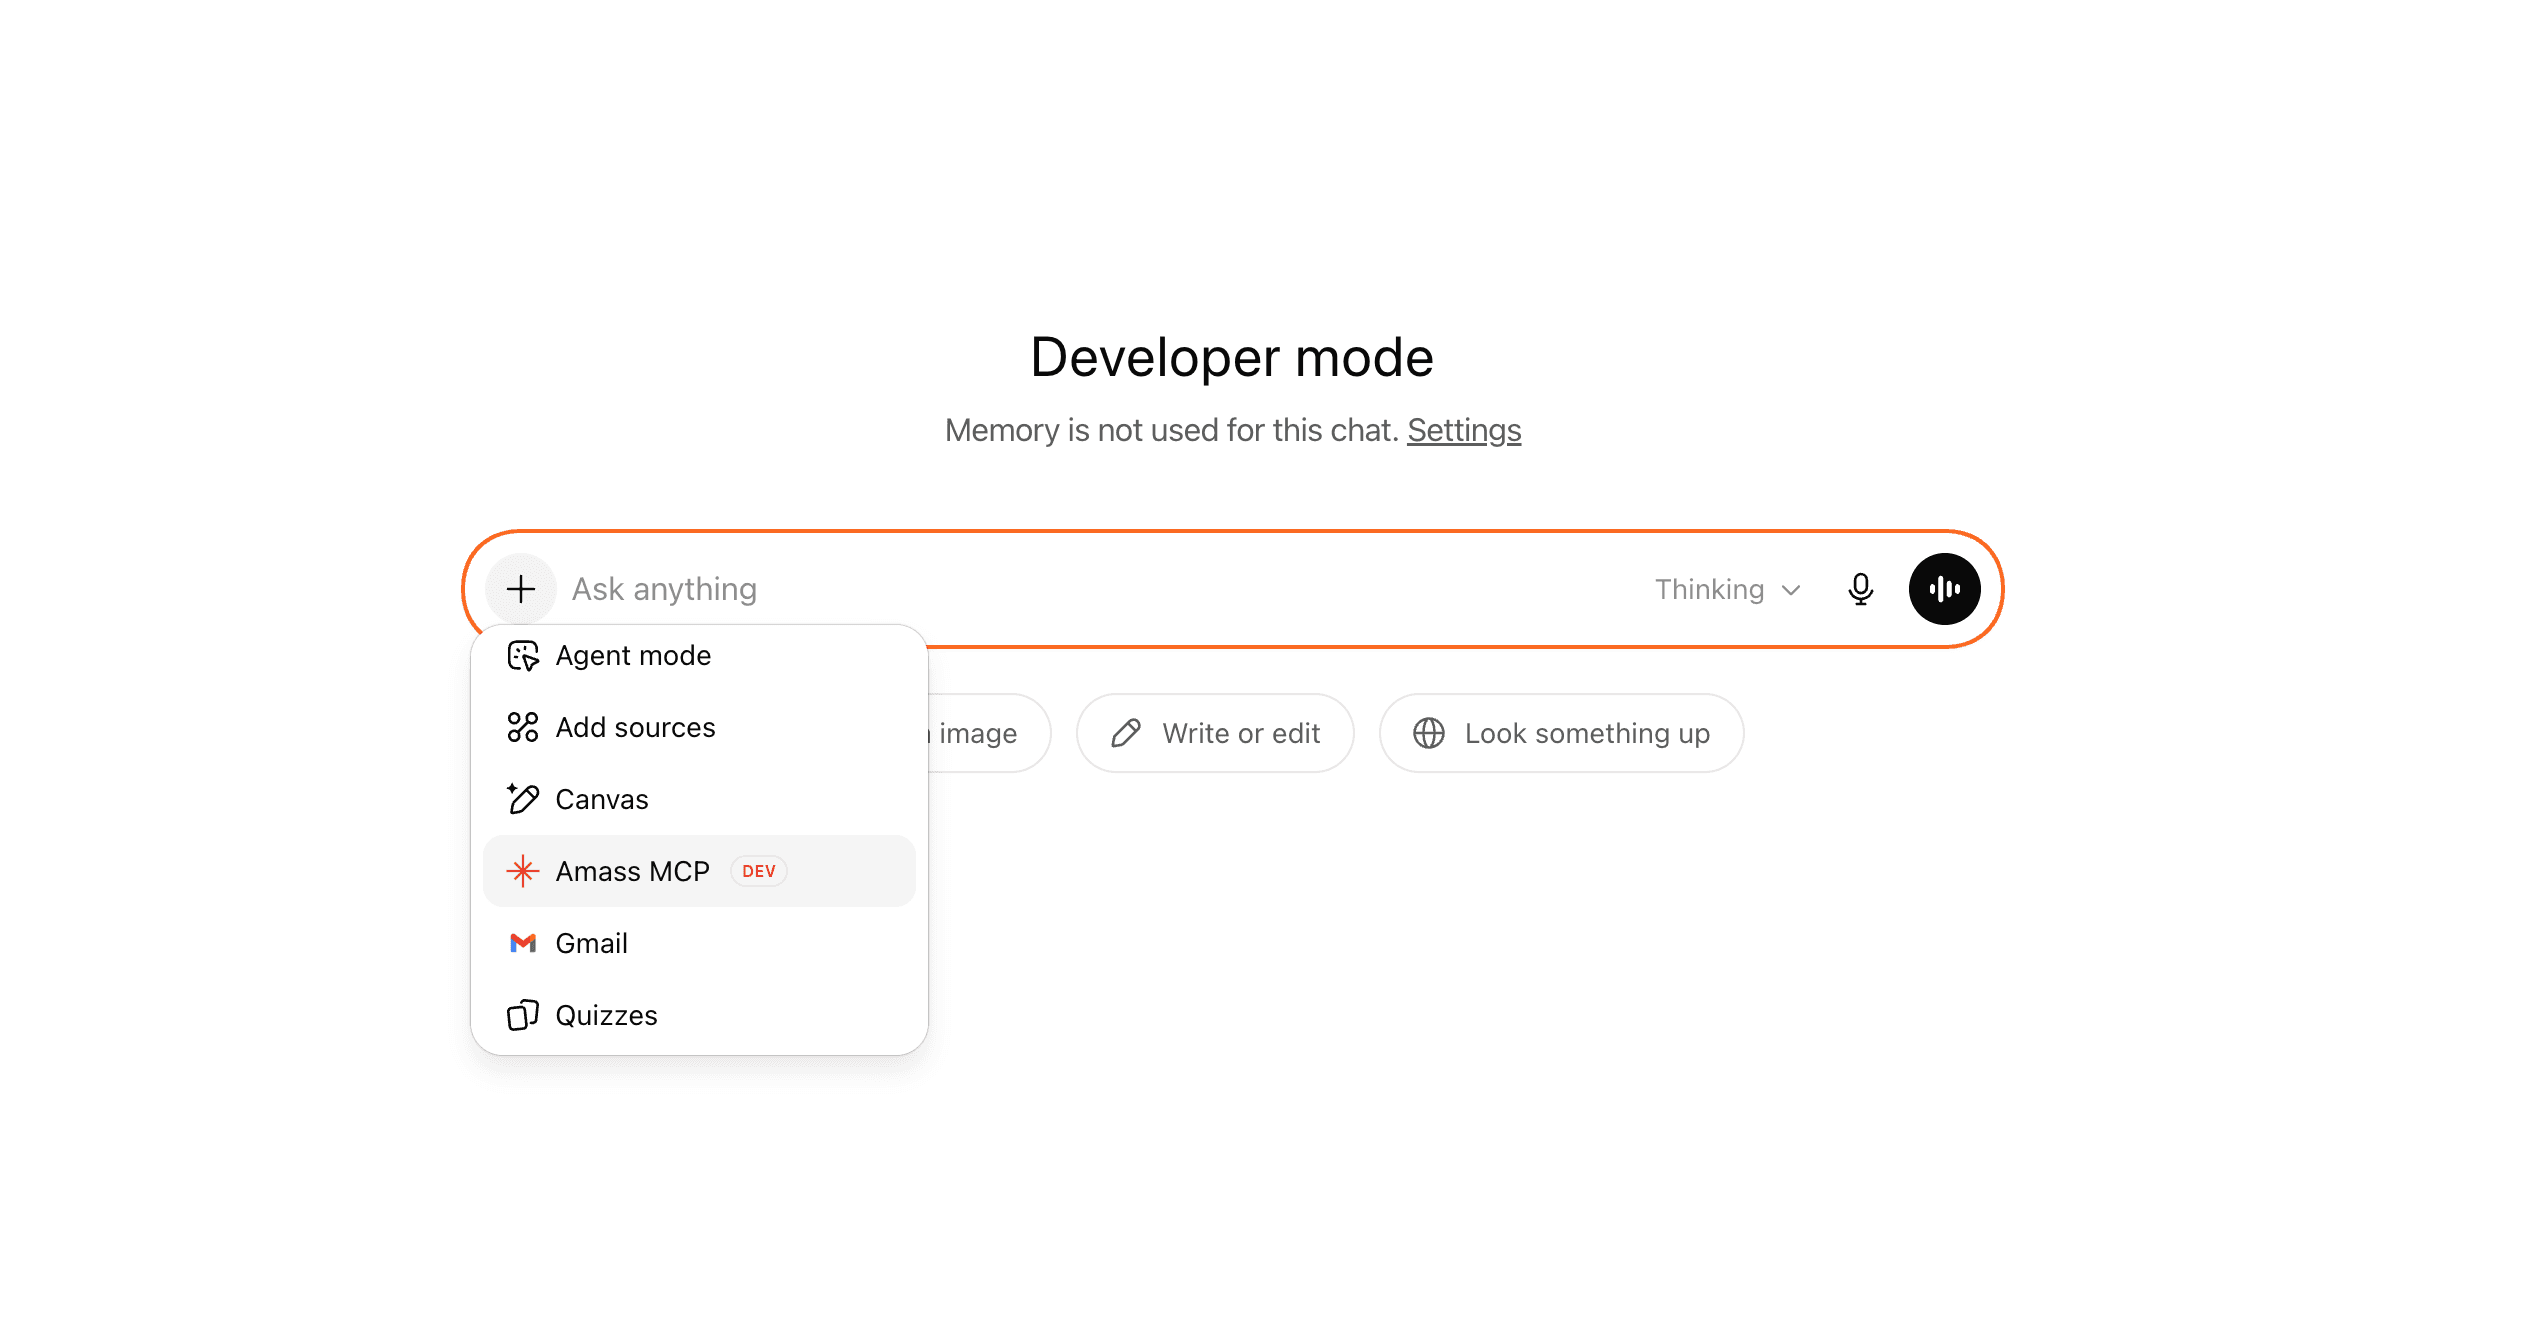
ComposerClick + → select Amass MCP
You'll be redirected to sign in with your Amass account. That's it — your existing plan's access applies through the MCP.
One command in your terminal:
claude mcp add amass --transport http https://mcp.amass.tech/mcpOAuth opens in your browser on first use.
You'll be redirected to sign in with your Amass account. That's it — your existing plan's access applies through the MCP.
Option 1
CLI
codex mcp add amass --transport http https://mcp.amass.tech/mcpOption 2
Edit ~/.codex/config.toml
[mcp_servers.amass]
url = "https://mcp.amass.tech/mcp"
Restart Codex after editing the config file.
You'll be redirected to sign in with your Amass account. That's it — your existing plan's access applies through the MCP.
Enterprise
Deploying to a Microsoft 365 environment?
Amass can be deployed inside Microsoft 365 Copilot as a declarative agent, sideloaded by your IT admin and surfaced across Teams, Outlook, Word, and Excel. The same Amass MCP runs underneath, with the same Amass-plan-based auth — no separate licenses, no new API keys.
Talk to usFAQ
Honest answers.
Which assistants is the Amass MCP available in?
Claude (Pro/Max/Team/Enterprise), ChatGPT (Plus/Business/Enterprise/Edu), Claude Code, Codex CLI. Microsoft 365 Copilot via enterprise deployment. Perplexity, Gemini CLI, and other MCP-compatible clients should also work — let us know if you try one of these.
Is the connector approved by Anthropic, OpenAI, or others?
Not yet — the Amass MCP installs as a custom connector in each assistant. The install flows are the “add custom connector” or “developer mode” paths in each product. Functionally it works the same way; we're working on directory listings.
Do I need an API key?
No. The MCP authenticates via your existing Amass plan. You'll sign in once when you connect.
Does this work on ChatGPT Plus?
Yes. Custom MCP connectors are available on ChatGPT Plus, Business, Enterprise, and Edu — installed via Settings → Apps → Developer mode on the ChatGPT web app.
What data does Amass have access to?
Only the queries the assistant sends and the responses we return. The assistant runs on your provider's infrastructure, not ours.
My company uses Microsoft 365 — what are my options?
We can ship a declarative agent backed by the same Amass MCP for sideload by your IT admin. See the Enterprise section above and get in touch.